


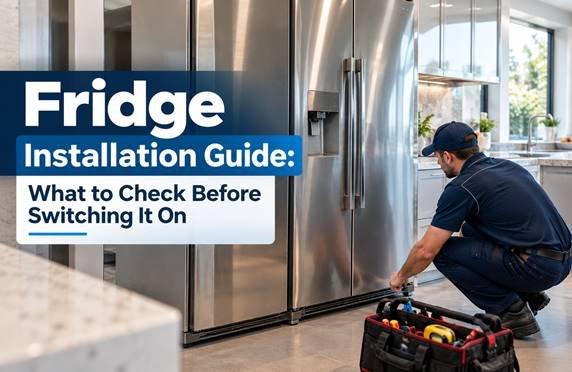
Installing a refrigerator involves more than finding a space and plugging it in. Ventilation, door clearance, positioning and first-use instructions all affect how the appliance operates.
This guide explains what to check when installing a freestanding household fridge, replacing an existing refrigerator or planning a built-in installation.
Before Delivery: Measure the Route and the Kitchen Space
A fridge can fit inside its intended recess but still be difficult to deliver—or impossible to use comfortably once installed.
Check three separate spaces:
| Space | What to measure |
|---|---|
| Delivery route | Doorways, corridors, stair turns, lifts and entrance steps |
| Fridge recess | Width, height and depth, including the required ventilation gaps |
| Operating space | Door swing, handles, nearby walls and room to pull crisper drawers out fully |
Check the depth of the alcove against the depth of the cabinet, not just the front measurement. Skirting boards, power points or water connections located behind the appliance reduce the usable depth.
Confirm whether doors can open past 90 degrees if internal crisper bins or glass shelves require full opening to be removed for cleaning.
How Much Ventilation Does a Fridge Need?
Refrigerators do not create cold; they extract heat from inside the cabinet and expel it into the room through condenser coils located at the back, sides or underneath.
Without adequate airflow, heat builds up around the cabinet. The compressor is forced to run longer, power consumption increases, temperatures fluctuate, and the lifespan of internal components drops significantly. Always consult manufacturer resources such as official Fisher & Paykel installation guides for model-specific clearance diagrams.
- Follow clearance diagrams: Check the clearance diagram in the user manual before final positioning (typically 20mm–50mm at sides, 50mm at the rear, and 50mm–100mm overhead).
- Keep base grilles clear: Never obstruct front base grilles, plinths or kickplate vents with rugs, doorstops or floor mats.
- Prevent squashed lines: Ensure power cables and flexible water hoses behind the appliance are not squashed or restricting rear heat discharge.
- Freestanding vs built-in rules: Never install a freestanding refrigerator into an enclosed cupboard without purpose-built ventilation cutouts.
- Maintain exhaust paths: For built-in or integrated units, verify that top or plinth air intake and exhaust channels remain completely open and unobstructed.
Choose a Suitable Location
Where you place a refrigerator has a direct impact on its day-to-day energy efficiency and cooling performance. Garages, enclosed balconies, poorly ventilated pantries, and outdoor alfresco areas often experience extreme temperature swings. Domestic fridges are engineered for specific climate classes (typically ambient temperatures between 10°C and 43°C across Australia).
Placing an appliance in direct sunlight or adjacent to heat-emitting appliances (ovens, dishwashers, cooktops) forces continuous cooling cycles and premature compressor wear.
- Position away from direct sunlight, radiant windows and heat sources (stoves, heaters, ovens).
- Ensure adequate ambient ventilation across all surrounding clearances.
- Choose a solid, level floor capable of bearing the full weight of the fridge when completely stocked with groceries.
- Allow practical clearance for periodic cleaning, coil dusting, and servicing access.
- Ensure direct access to a dedicated electrical wall outlet without using extension leads.
- Ensure proximity to a cold water supply tap with an accessible isolation valve (for ice & water models).
Moving and Unpacking the Refrigerator
Large household refrigerators are heavy, front-weighted appliances that require careful handling during delivery and positioning:
- Use appropriate moving equipment: Always use an appliance trolley with safety straps and non-marking rubber wheels to prevent personal injury and floor gouging.
- Inspect immediately upon delivery: Examine the external cabinet, door corners, handles, and door seals for any transit damage before delivery drivers depart.
- Remove all packaging materials: Strip away all exterior protective film, shipping tape, internal polystyrene blocks, tape retainers, and drawer travel locks before connecting power.
- Wash internal surfaces: Wipe down interior walls, glass shelves, and crisper bins with a mild solution of warm water and dish soap to remove packaging dust and factory odours before storing food.
How Long Should a Fridge Stand Before Being Switched On?
A common mistake after delivery is plugging a refrigerator in immediately. Inside the sealed refrigeration system, oil lubricates the compressor pump. During transit, tilting or vibration can cause this oil to migrate up into the cooling coils.
Turning the compressor on while oil remains trapped in the refrigeration lines can cause hydraulic resistance, oil lock, or capillary blockages that prevent proper cooling.
If transported completely upright: Let the refrigerator stand in its final position for at least 2 to 4 hours before plugging it in.
If laid flat or tilted heavily (more than 45 degrees): Let the refrigerator stand upright undisturbed for at least 12 to 24 hours before turning it on so oil can drain completely back into the compressor sump.
Level the Cabinet and Check the Doors
An unlevel refrigerator causes doors to swing open unintentionally, misaligns magnetic door gaskets, prevents condensation drainage, and creates excessive vibration noise. Consult manufacturer guidelines such as the Samsung Refrigerator Support portal for specific leg adjustment mechanisms.
- Use a spirit level: Place a spirit level on top of the cabinet to check both side-to-side balance and front-to-back tilt.
- Set a slight backward tilt: Adjust the threaded front levelling feet so the front of the fridge sits approximately 5mm to 10mm higher than the rear. This slight tilt allows doors to swing closed naturally under their own weight.
- Check magnetic door seal contact: Close a strip of paper in the door seal. If the paper slides out freely with no resistance, the door hinge requires alignment or the feet need further adjustment.
Power Connections: Positioning Is Different From Wiring Work
Connecting a refrigerator to power involves specific electrical safety considerations:
- Dedicated wall socket: Plug the appliance directly into its own dedicated, earthed 240V AC 10A standard Australian wall outlet.
- No double adaptors or extension cords: Never use double adaptors, power boards, or extension leads. High starting currents can overheat loose adaptors and cause voltage drops that damage compressor motor windings.
- Avoid crushed cords: Guide the power lead carefully as the fridge is pushed back into its alcove so the cord is not pinched, crushed, or resting against hot compressor surfaces.
- Trade licensing notice: Any socket relocation, dedicated circuit installation, or switchboard alteration must be performed by an electrician licensed under NSW Fair Trading Electrical Trade Licensing.
What About Fridges With a Water Connection?
Refrigerators with automatic ice makers and chilled water dispensers require connection to a potable cold water supply (typically via 1/4" PEX or copper tubing):
- Isolation tap access: Install an accessible shut-off isolation tap so water can be turned off instantly during maintenance, filter replacements, or emergencies.
- Operating water pressure: Verify water pressure is within manufacturer limits (typically 138 kPa to 827 kPa / 20 to 120 psi). Excessive pressure requires an approved pressure limiting valve.
- Licensed plumbing: Fixed plumbing connections to the building mains in NSW must comply with the Plumbing Code of Australia and be completed by a licensed plumber.
- Flush the internal filter: Before drinking water or using ice, dispense approximately 8 to 10 litres (2 to 3 gallons) of water through the system to purge trapped air from the lines and flush carbon particles from the new filter. Discard the first 2 to 3 batches of ice cubes.
Built-In and Integrated Fridges Need Their Own Installation Plan
Integrated refrigerators sit flush inside custom kitchen joinery with decorative cabinet doors attached to the appliance front:
- Anti-tip safety brackets: Built-in refrigerators are tall and front-heavy when loaded. Always secure the supplied anti-tip wall brackets to solid wall studs to eliminate tipping risks.
- Plinth and top ventilation channels: Custom joinery must incorporate dedicated air intake cutouts at the base plinth and clear exhaust paths above the cabinetry.
- Cabinetry door panel weights: Adhere strictly to the maximum door panel weight limits specified in your installation manual to avoid damaging door hinges over time.
First Startup: When Can You Put Food Inside?
Once powered on, a refrigerator requires several hours of empty operation to pull internal temperatures down to safe storage levels:
- Initial pull-down time: Allow the refrigerator to run empty for at least 4 to 12 hours (and up to 24 hours during hot Australian summer conditions) before loading groceries.
- Target safe temperatures: Verify the fridge compartment drops below 5°C and the freezer reaches -18°C or colder in compliance with NSW Food Authority Temperature Danger Zone guidelines.
- Do not overload initially: Adding warm room-temperature groceries immediately overworks the cooling system. Load pre-chilled foods gradually once cabinet temperatures have fully stabilized.
Is It an Installation Problem or a Fridge Fault?
Before assuming a brand-new or recently moved appliance has a mechanical fault, compare observed symptoms against common installation factors:
| What you notice | First thing to check |
|---|---|
| Sides of cabinet feel hot | Normal during initial cool-down as heat pipes dissipate warmth; ensure minimum 20mm–50mm side ventilation clearance. |
| Fridge runs continuously without stopping | Ambient room temperature is high or door was opened frequently during first startup; verify rear clearance and door seals. |
| Doors pop open or will not stay closed | Cabinet is tilted forward; raise front levelling legs to create a slight backward tilt. |
| Water pooling on floor or behind cabinet | Check that water connection fitting is tightened, drain pan is correctly positioned over compressor, and water line is not pinched. |
| Excessive vibration or rattling buzzing noise | Cabinet is not resting evenly on all feet, or rear tubing/coils are vibrating against a wall or skirting board. |
| Ice maker not producing ice after 24 hours | Confirm water shut-off valve is open, water line is purged of air, and freezer temperature has reached -18°C or colder. |
Fridge Still Not Cooling After Proper Installation?
If your refrigerator fails to reach safe temperatures, displays error codes, or makes abnormal noises after following all installation checks, speak with our certified refrigeration technicians for prompt diagnostic support.
Fridge Installation Checklist
Review these 10 essential pre-flight verification items before switching your refrigerator on:
- ✓ Delivery route, hallways, and doorways measured with adequate clearance for transport.
- ✓ Fridge recess dimensions checked including width, height, and depth plus required ventilation gaps.
- ✓ Skirting boards, power points, and plumbing valves factored into depth measurements.
- ✓ Internal shipping tape, transit brackets, foam inserts, and exterior protective film completely removed.
- ✓ Appliance allowed to stand upright undisturbed (2–4 hours if upright, up to 24 hours if tilted).
- ✓ Front levelling feet adjusted for a subtle backward tilt and smooth automatic door closure.
- ✓ Magnetic door gaskets verified with the paper slip test for continuous airtight sealing.
- ✓ Power lead routed safely and plugged directly into an earthed 240V socket without adaptors.
- ✓ Water filter flushed (8–10 litres dispensed) and plumbing connection checked for zero leaks.
- ✓ Appliance allowed to cool empty to <5°C (fridge) and ≤-18°C (freezer) before loading groceries.
Frequently Asked Questions
No. Freestanding refrigerators need at least 50mm of clearance at the rear to allow the condenser coils and compressor to shed heat. Pushing the fridge against the wall restricts airflow, drastically increases energy consumption, and can cause the compressor to overheat.
Only if the cabinetry is specifically modified with dedicated lower intake and upper exhaust ventilation grilles that meet the manufacturer's required airflow volume. Enclosing a standard freestanding fridge without ventilation will cause it to overheat and fail prematurely.
No. Domestic refrigerators come from the factory with a hermetically sealed refrigeration system containing the exact factory charge of refrigerant. They do not require "regassing" or refrigerant top-ups during installation.
A slight backward tilt (approx. 5mm–10mm) is intentional and recommended by manufacturers. It ensures that gravity helps swing the doors closed and compresses the magnetic door seals tightly against the cabinet frame, preventing cold air leaks.
Yes. Commercial cabinets typically produce substantially more heat, require dedicated 15A or 20A electrical circuits, feature dynamic forced-air refrigeration systems, and demand larger clearance zones or ducted condenser exhausts.
Need Help With a Refrigerator That Is Not Working Correctly?
If an existing fridge is leaking, failing to cool or behaving differently after a move, record the symptoms and model details before calling. Fast Fridge Repairs provides prompt on-site diagnostic inspections and repairs across Sydney.